
The motion detection system is one of the most useful inventions when it comes to home security. More and more homeowners are now installing these systems to prevent burglars from breaking into their homes. For those who do not want to spend money to buy moving machines and who want to check electronic devices, it would be nice to know that a personal computer can now be converted into a motion detection system.
What you will need
The main requirement will be a personal computer running on Windows 98, Windows ME, Windows 2000 or Windows XP. A webcam is also required for this setup as well as a free or open source webcam resource (like Dorgem).
In the event that a personal computer is not available, you will also need to have a File Transfer Protocol (FTP) account to upload photos taken ‘off-site’.
How to set it up
If you think a webcam already exists on a computer, the next thing you need to do is download the camera app (like Dorgem, which is a free app). Once downloaded, install it and follow the instructions to install it correctly. When the installation is complete, open the camera app and select the webcam from the drop-down menu to select camera.
Click the preview button to check out what the webcam view has. Adjust the camera body so that it can capture the surveillance area. To make changes to the camera settings (brightness, brightness and other settings), click on source. Click OK when you have finished editing.
In the Camera application options section, look for the options button and look for the motion detection option. Check the box next to it and click OK.
To keep a record / shot, you will need a profile. To do this, open the main camera app window and look at the ‘storage’ option and click on it. If it asks for storage type, click ‘File’ and then click OK. To set up storage settings, you will need to enter a file name and create a time interval. It would be a good idea to set a short interval (in seconds). If there is an option to request a file name, you can set the file name to whatever you like. This filename will be the default file name for web-based photography. Click OK when setting up storage settings is done and close the main camera app window.
Testing the Advanced Motion Detector
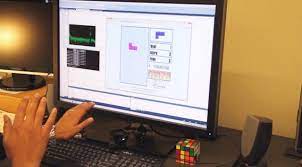
After installing it, check it by raising your hand in front of your camera, or any movement to check if it is working. If the system is set up correctly, the photos should be stored in the storage folder you specified while you were editing. If it doesn’t work, double check everything until you make sure you have done the right steps to turn your computer into a motion detection system.